Schedule and book clients effortlessly with the Booking tool
The Booking tool allows clients to book appointments directly through your website without the need of a phone call. This article will show you what booking an appointment looks like from the client's perspective as well as how to personally add and view bookings within your GoSite Dashboard!

What device are you using?
Desktop
Scheduling Appointments Through the Booking Link on your Site
1. If your client clicks the "Book an Appointment" button on your website's banner, the following form will appear:
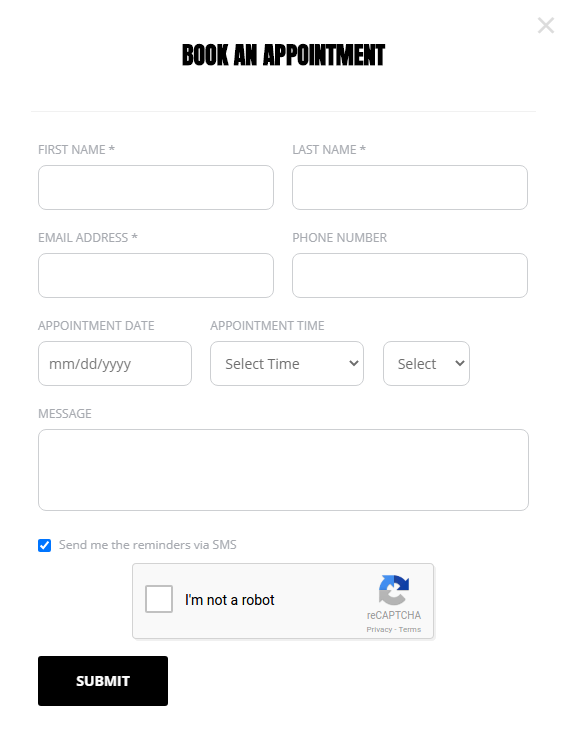
2. The client is then required to fill out “First Name,” “Last Name,” and “Email Address” in order to book an appointment with your business.
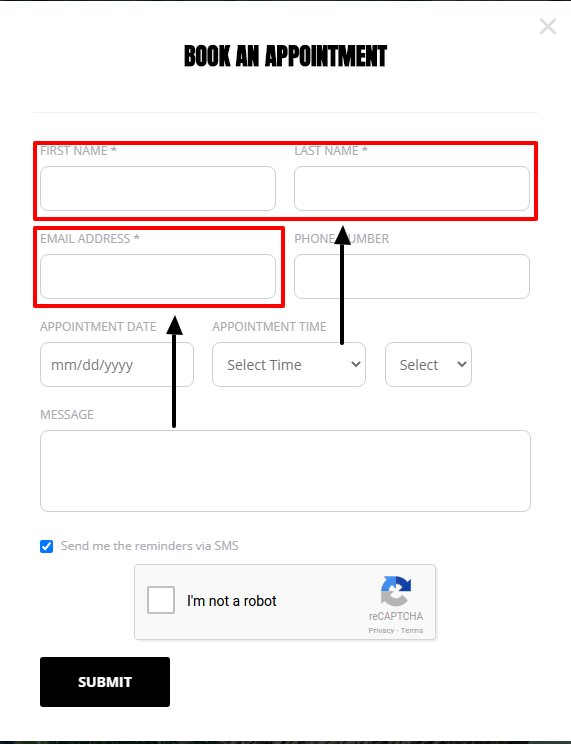
3. The clients may choose to be reminded of the scheduled appointment via SMS by checking the box labeled, “Send me the reminders via SMS.”
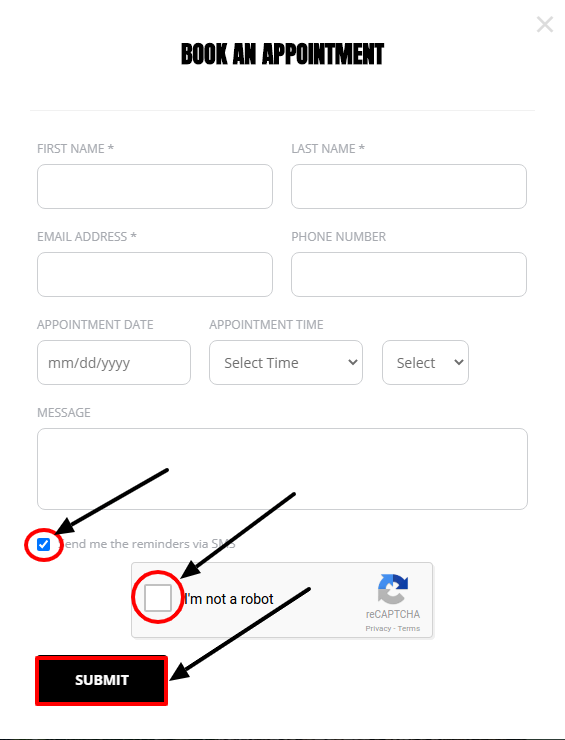
Note: Your clients will need to check the reCaptcha “I’m not a robot” box before they can click “SUBMIT” and complete the process.
4. Once your client submits the booking form, they will receive a confirmation email and SMS confirmation if they fill out the "Phone Number" section.
Viewing Appointments
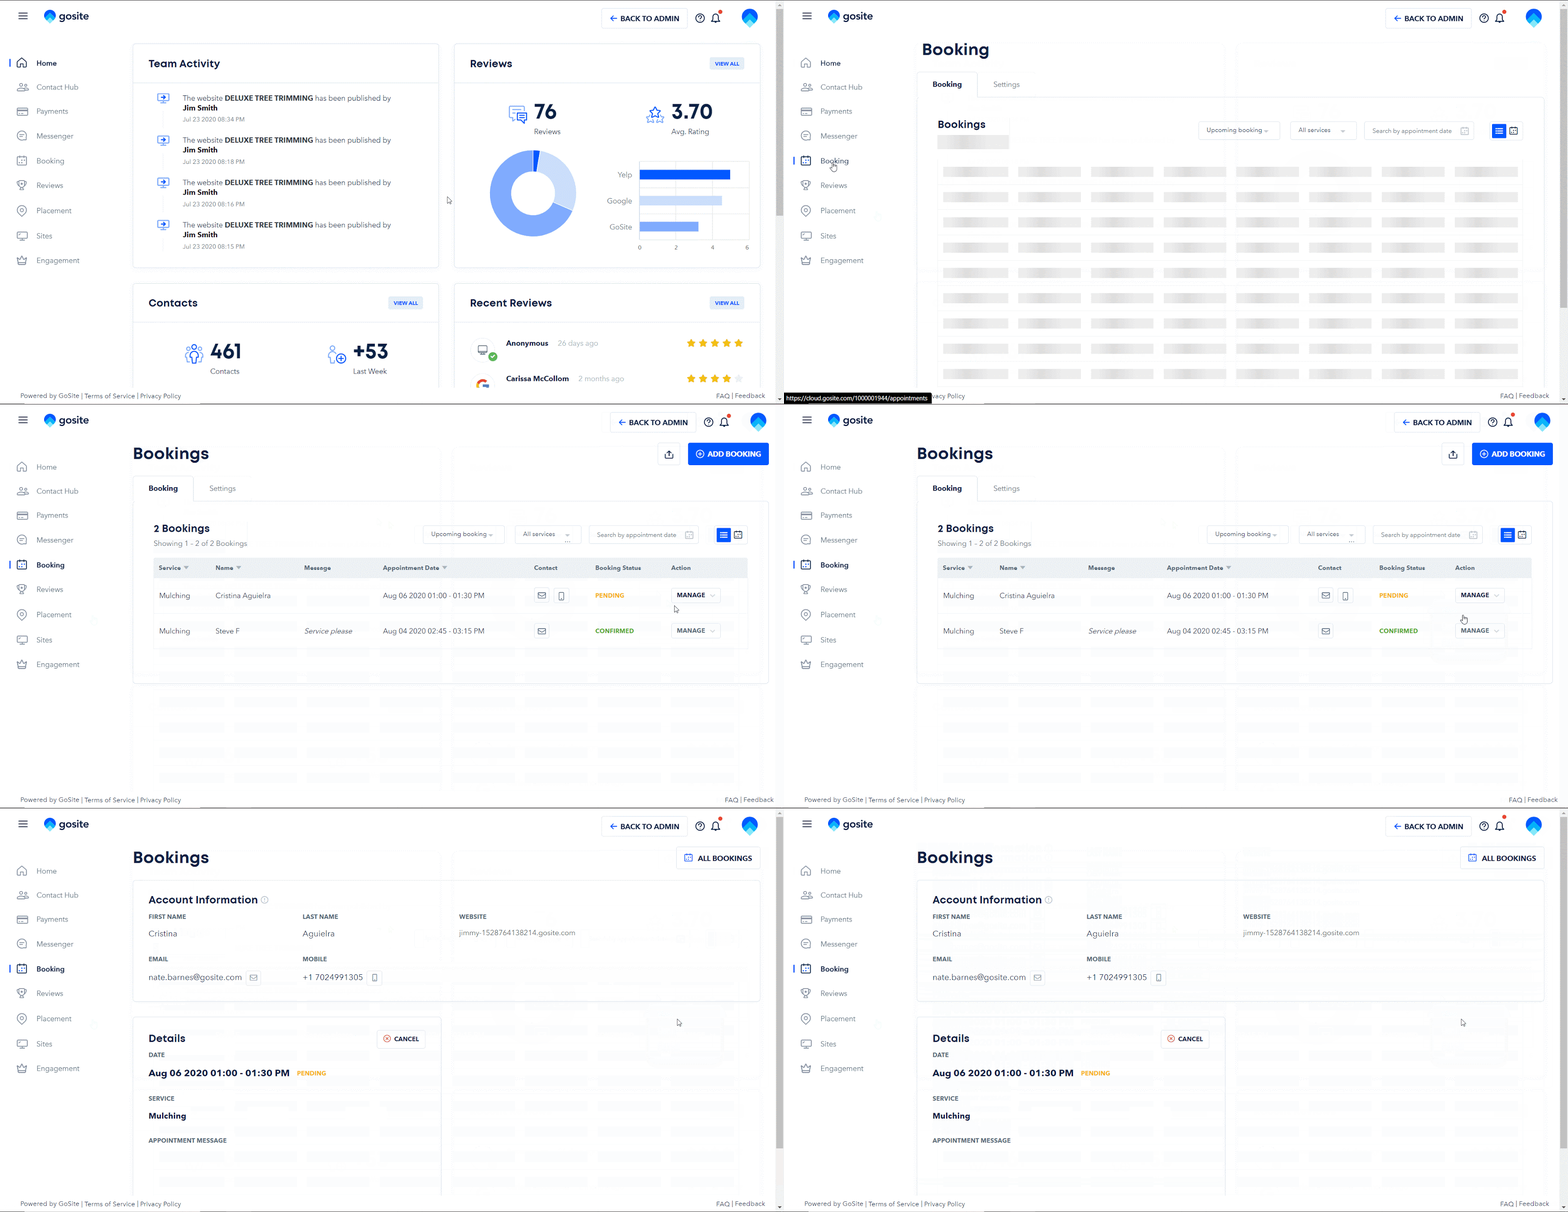
1. Log in to your GoSite Dashboard.
2. Click the “Booking” tab on the left side of the dashboard.
3. To view an appointment, hover over the grey “Manage” button on the right-hand side of the page. Then, click “View."
4. You can now view your client’s contact information and appointment details. This will help you organize your day and prepare for any upcoming or past appointments!
Manually Adding a Booking Through the GoSite Dashboard
1. To manually add a booking, log in to your GoSite Dashboard.
2. On the left panel, click “Booking.”
3. On the upper right side, click “+ Add Booking.”
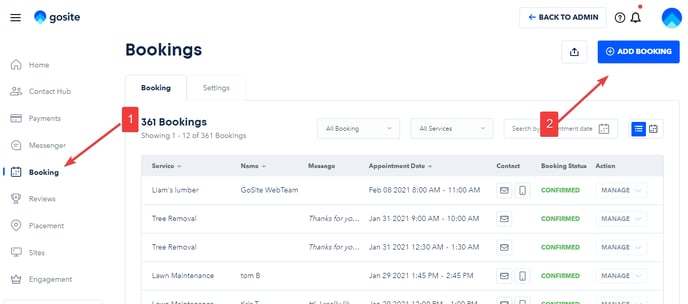
4. Fill out the required fields of the "Add Booking" form. Required fields are indicated by a red asterisk (*).
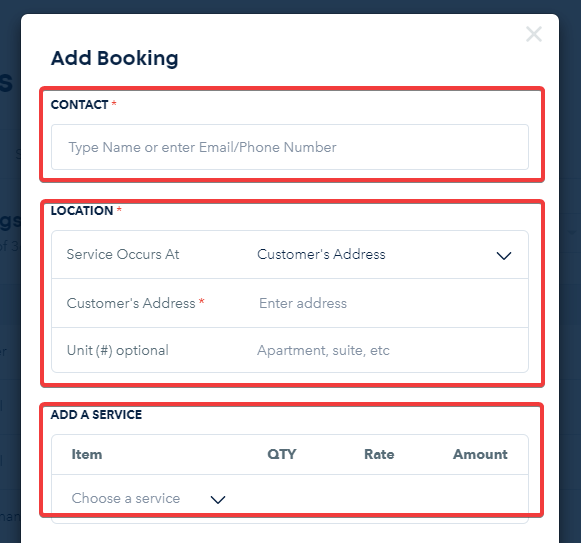
5. Use the “Customer Reminders” option to send the client an email notification about the booking. You also may also send a reminder via SMS.
6. Click "Continue."
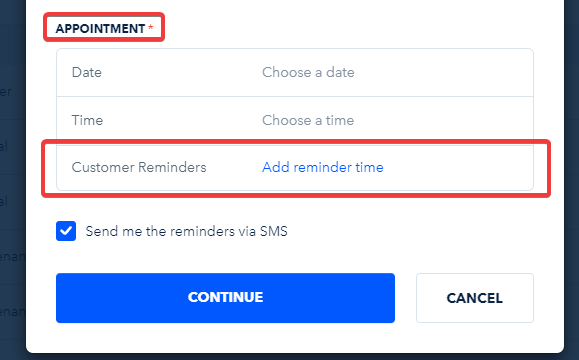
7. A new form will appear containing all the booking information you’ve added. This form will be sent to your customer via email and SMS.
8. If the customer's email address was added to the booking, under "Email Message" you can select a confirmation email template (you can add new email templates under My Account) that will be sent to your customer.
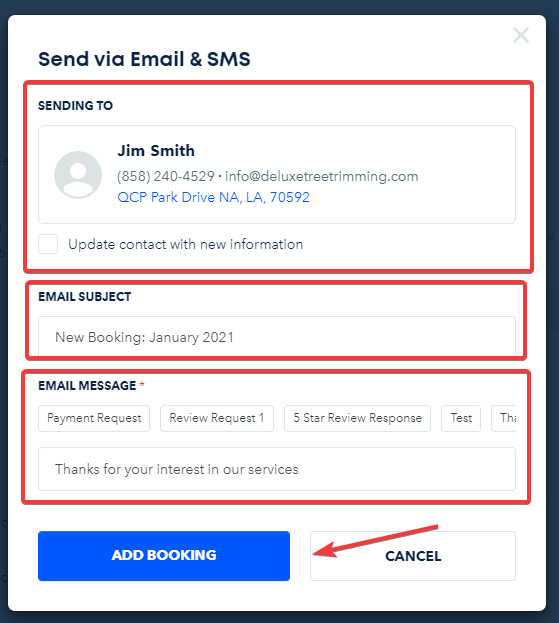
9. Click "Add Booking." A confirmation SMS and email will be automatically sent out within minutes of booking an appointment!
Note: If you do not add a customer's email address to the booking, only an SMS will be sent. If you do not add a mobile phone number to the booking, only an email will be sent.
iPhone
Viewing and filtering bookings
-
Click the three-line menu icon in the bottom right corner.
-
Click "Booking."
-
You will then see a list of your booked appointments.
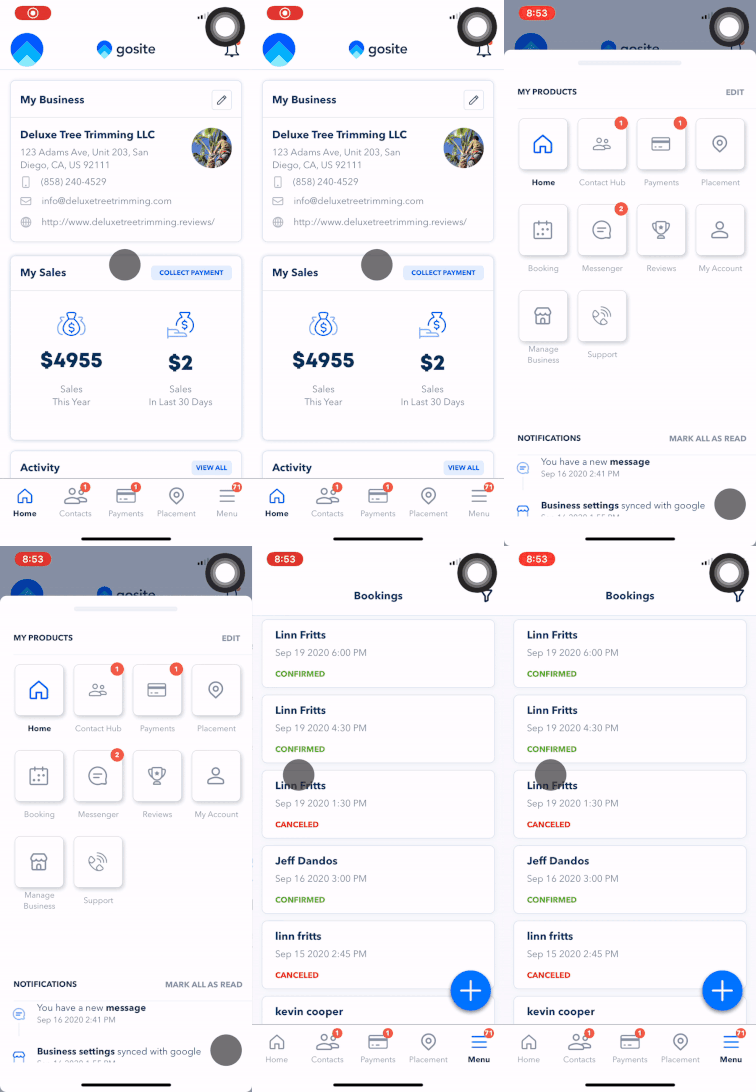
4. Use filters to sort your clients into different groups.
5. You have the option to sort your contacts by: “Pending booking,” “Upcoming booking,” “Past booking,” “Canceled booking,” and "Client name."

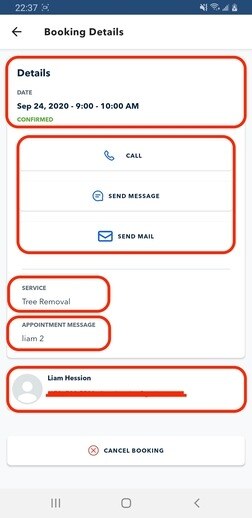
6. To view the Booking Details of an individual booking, click the desired appointment.
8. You can also call, send SMS, email, and cancel an appointment from this view!
Adding a booking
-
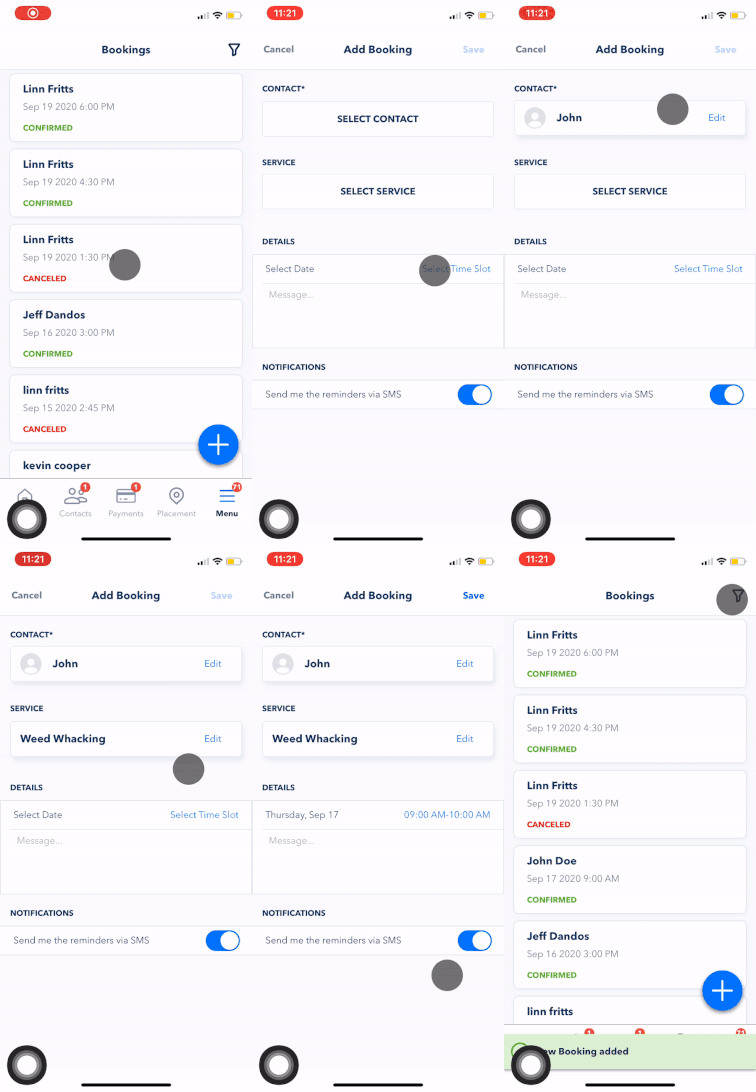
To add a booking, click the blue and white '+' button on the right hand corner.
-
Select a contact or add a new contact.
-
Select the Service you would like to book. You can also add a new Service.
-
Choose a date and time.
-
Write a short description of the appointment in the "Message" section.
-
Toggle "On" or "Off" to have SMS reminders sent to you.
-
The client will receive a confirmation email within minutes after completing the booking.
Android
Viewing and filtering bookings
-
Click the three-line menu icon in the upper lefthand corner.
-
Click "Booking" to view a list of your booked appointments.
-
Use the search bar at the top to find a specific booking. You may search by name, phone number, or email address.
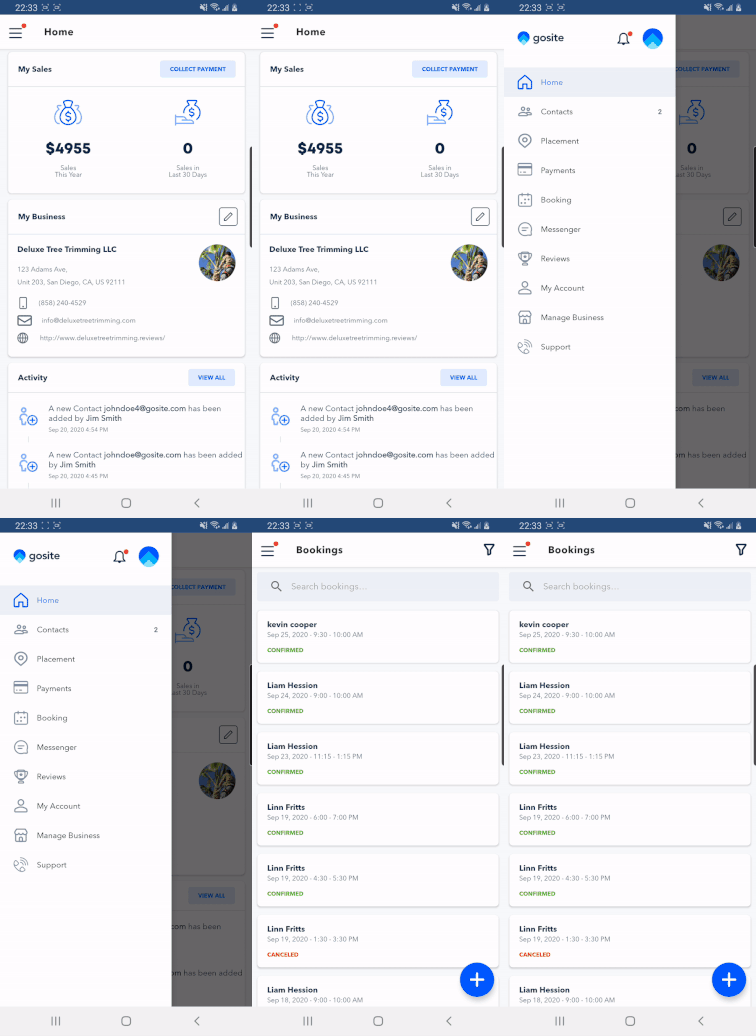
4. To filter bookings, click the filter icon in the top right corner.
5. From this page you can choose to sort your clients by the following statuses: “All booking,” “Pending booking,” “Upcoming booking,” “Past Booking,” “Canceled booking,” and "Client Name."
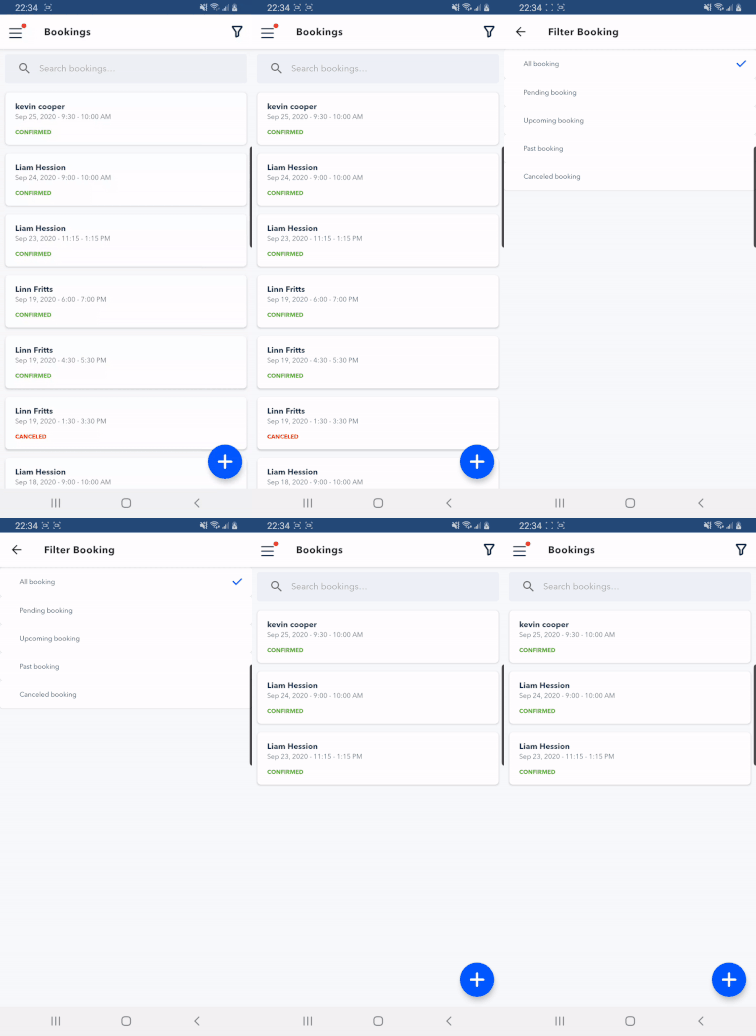
6. To view the booking details for an individual booking, click on a booking. You may call, send an SMS, email, and cancel the booking from this view.

Adding a booking
-
To add a booking, click the “+” button on the lower righthand corner.
-
Click "Select Contact" and add the desired Contact.
-
Click "Select Service" and add the desired Service.
-
Under “Booking Details”, you may add “Customer Reminders.” Use these reminder to send clients a notification prior to the scheduled booking time.
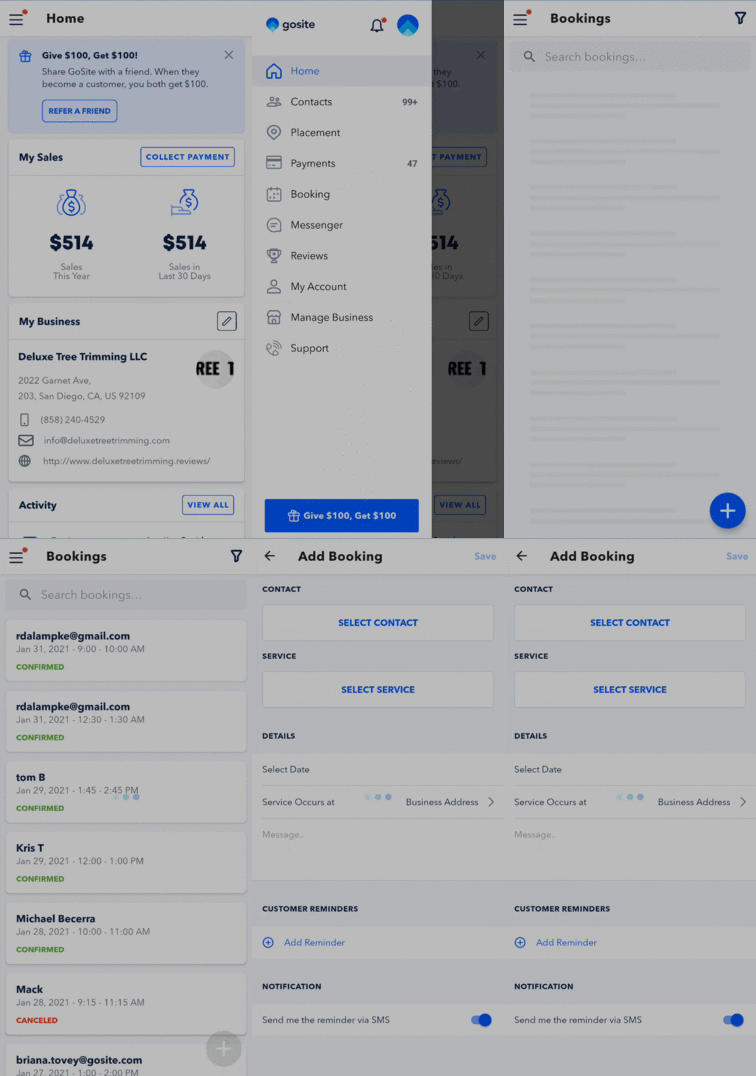
5. Select the date and time.
6. Add a short description or any notes for the booking in the "Message"
section.
7. Toggle SMS reminders On or Off.
8. Click "Save" in the top right corner to save your booking!
9. The client will receive a confirmation email within minutes after completing the booking.

Learn more about How to Cancel or Reschedule Booked Appointments
Still need help?
Visit us at gosite.com to chat, or email us at help@gosite.com.