Your comprehensive guide to the payments application process to Stripe for GoSite

Provide your customers with digital convenience using a simplified payment experience. Quickly send payment requests, invoices, and reminders at the tap of a button --using Stripe for GoSite.
Here's a few things you should have handy:
-
SSN
-
Bank account information
To start your payments application process to Stripe for GoSite:
-
Login to your GoSite Dashboard.
-
Select “Payments” from the left-hand side of the dashboard.
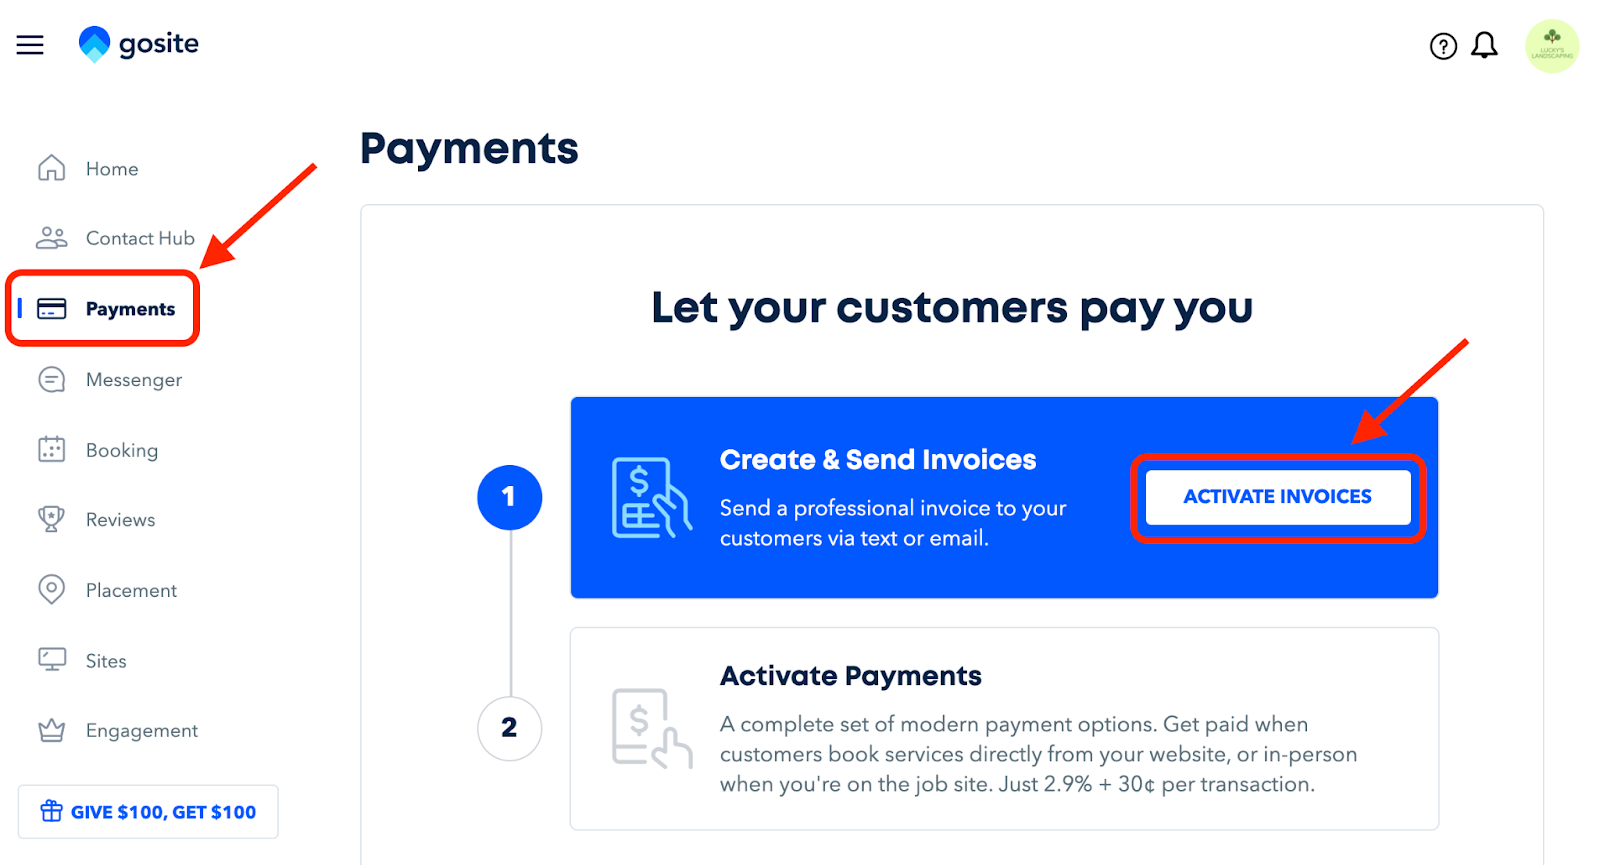
3. Click “Activate Payments.”
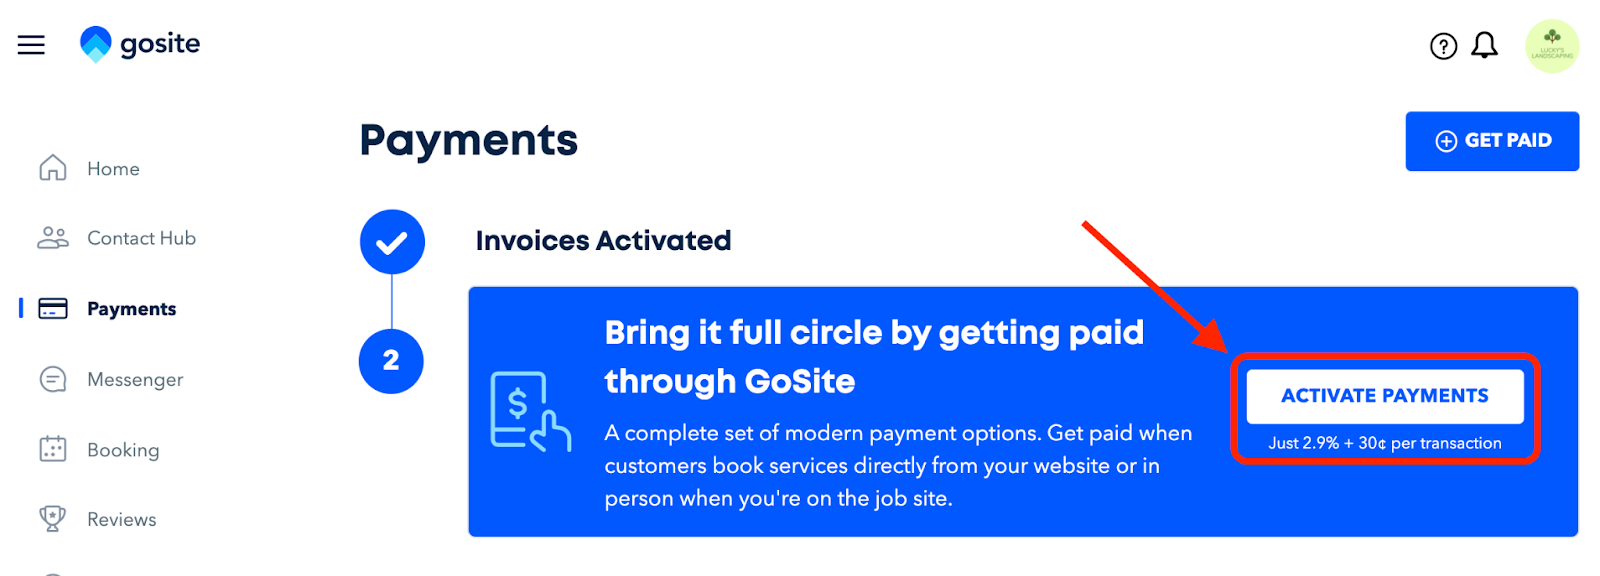
4. Provide a valid email address. If you prefer to connect your existing Stripe account to your GoSite Dashboard, please input the same email address.
 5. Verify your login via the 6-digit verification code sent to your phone.

Once verified, all business details and personal information from your GoSite account will automatically sync with your Stripe account. (Update your personal and business information, if needed.)
6. Provide Stripe with information necessary to complete your application, such as your registered business address, type of business and business structure.

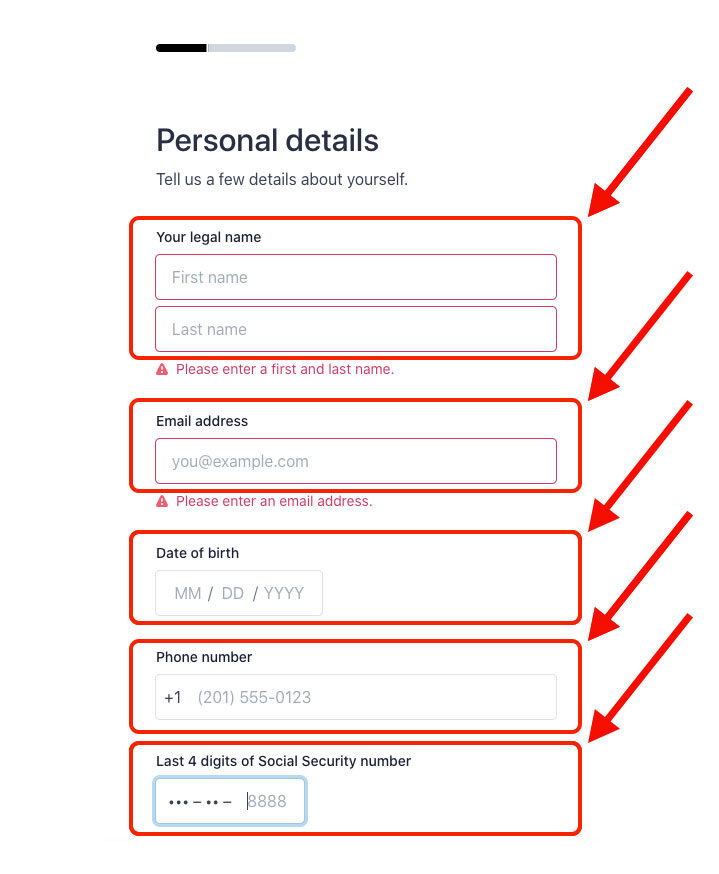
7. Input your personal details. Have your SSN handy for this step.
8. Next step would be for your professional details. Select your industry, add your website and product description.

9. Select an account for payouts. You can search for your bank or manually enter your bank details. Have your bank details ready.

10. Provide your customer support details in this next step. This information will help your customers recognize your business on their card statements, invoices, and receipts.
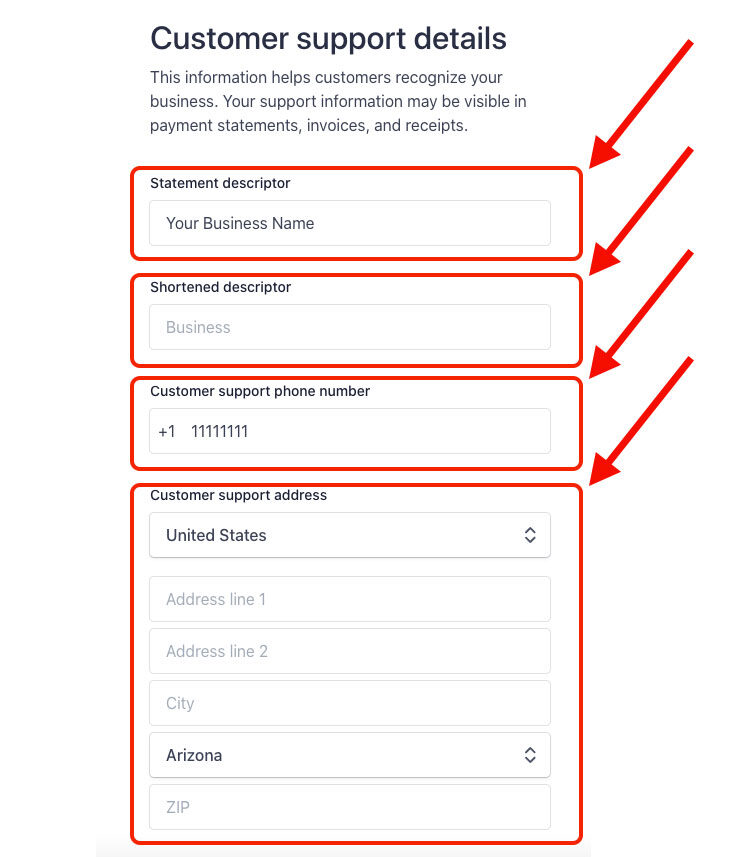
11. Lastly, review and verify accuracy of provided details. Once ready, click "Submit."
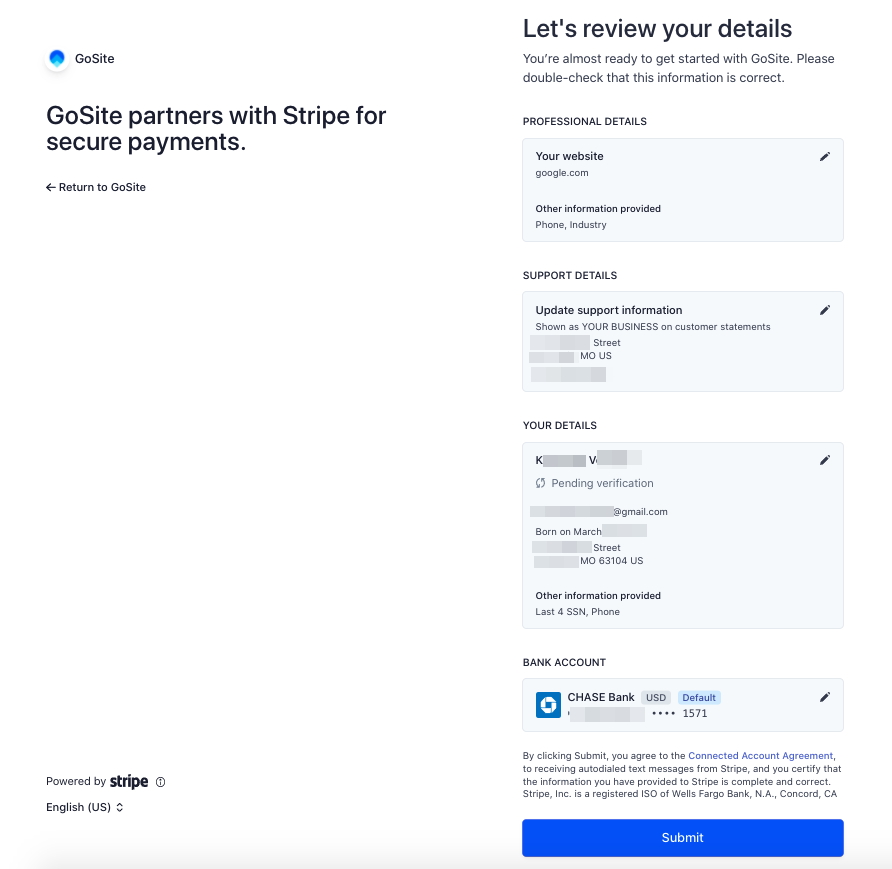
And that's it! Your application is now being processed. Approval typically takes from a few minutes up to a day to be completed.
Still need help?
Visit us at gosite.com to chat, or email us at help@gosite.com