Overview
While GoSite has a handful of fields you can enter information into (name, address, etc), you might have some fields of your own that you'd like to fill out.
Custom fields help you track additional information that is be specific to your business. For example, you may need to collect the square footage of your customer's house for a booking.
Currently, you can add Custom Fields to Bookings only but we will be adding support for Invoices, Estimates and Contacts in the future.
SETUP A CUSTOM FIELD
To add a new custom field, navigate to Avatar on Top Right > Manage My Business > Custom Fields on the left side.
Click “Add Custom Field” to get started
Note: You must set up custom fields on the GoSite Web App - you will not be able to create new custom fields on the iOS or Android App. However, fields you create on the web will show up on the booking tool on the mobile apps.
When you create a new custom field - you are prompted with the following options:
-
Product: Select the product that you would like this custom field to show up on. For now, custom fields are available on the booking product
-
Field Name: Enter what you want the name of the custom field to be.
-
Field Type: Select what type of custom field you would like.
-
Text Field: Creates a box where you can enter text
-
Dropdown: Creates a dropdown where you can add certain options
-
True or False: Creates a field that is Yes/No
-
Numeric: Creates a box that only accepts numbers
-
-
Default Value: Set a default value entry for it to automatically apply to this field throughout your account, or leave it blank so that you can enter in this information as you go.
-
For example, if you are a Tree Trimmer you may want to set “Clean Up” as “True” by default
-
-
Mandatory: Indicate if a field needs to be entered
-
When your customer creates a booking from your website, this setting ensures you are getting the information you need to complete the job.
-
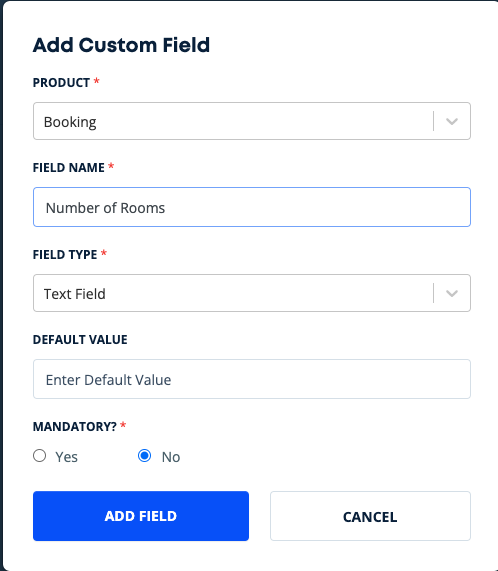
Click on Add Field to save the Custom Field.
Created a custom field? Read this article about how to use them in the Booking tool.
Note: You can add up to 5 custom fields on your plan. Need more fields? Please reach out to help@gosite.com